Raspberry Pi and Camera
We use the Raspberry Pi Zero W with the Raspberry Camera v2. The camera is mounted in the Camera Pipe.
Camera in Pipe
- Seal the camera with Elastosil. Use the pink dispenser needle with 0.58mm diameter
- Add the 15cm Pi Zero camera cable
- Fix the camera cable connector with hotmelt
- Fix the camera with the four 1,7 x 4mm screws
Raspberry UART / Power Cable
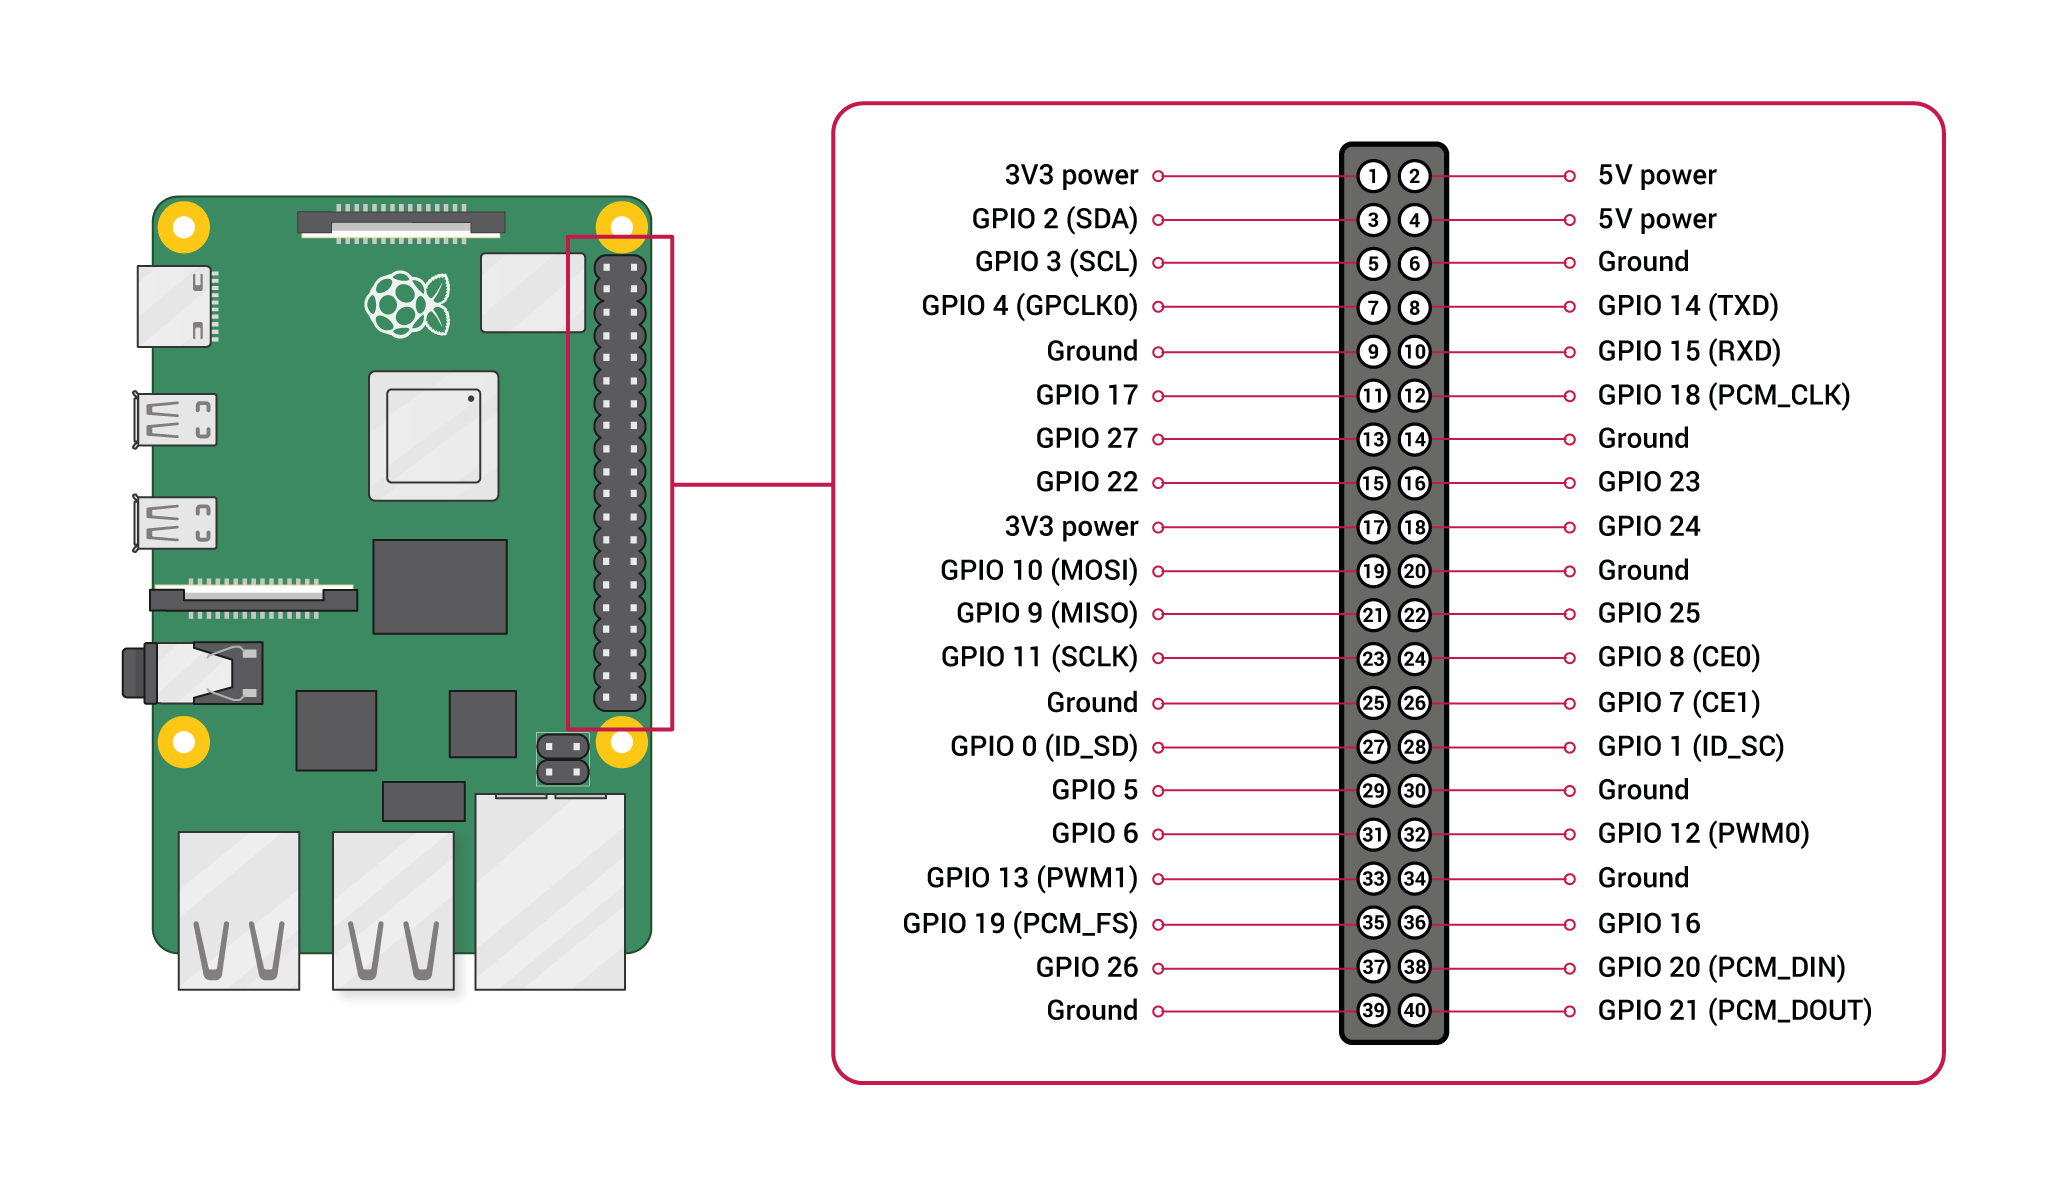
The Raspberry 40 pin header must be connected to the PixRacer Telem2 and the power supply from the power module.
- Cut one 6inch (152mm) JST-GH Cable in the middle
- Cut 4 parts 140mm of the yellow cable
- Remove 8 mm of the isolation of the JST-GH and the yellow cables on one side
- Make a Y cable by putting the JST-GH and two yellow cables together with the white solder sleeve. (Heat level 5-6)
- Make two of the above cables
- One of the two yellow cables will go to the right side Pi where there are connected with a Harwin M20 connector.
- Remove 3-4 mm isolation of the one of the yellow cables
- Crimp a Harwin M20 connector to the cable with the Harwin crimp tool. Use the 26-28 AWG slot.
- Push the cable through until you can barely see the copper - then crimp.
The PixRacer Wiring Quickstart shows the 6 pin Telem1 and Telem2 connector wiring. We only need GND, TX and RX. GND and RX will be connected with the Y-Cable. In that image the yellow connector is the PixRacer TX port which goes to the Pi RX port. So the Y-Cable is connected to GND and the yellow pin marked “RX”.
- Connect the Y cables to the 6-Pin JST-GH connector. One to GND, the other one to the pin marked “RX”
- Take an 8-inch JST-GH cable and remove the connector at one side. Remove 5mm of the isolation at the other.
- Put this cable in the JST-GH connector at the location marked “TX”. This is the UART RX port of the PixRacer.
Now the power connections from the PowerModule are left.
- Take two 6-inch JST-GH cables and remove the connector at one side
- Crimp the Harwin M20 connector at that side
- Insert the JST-GH Cables in pin 1 and 3 of the JST-GH 4 pin power connector
To mark the cables use colored heating tube.


